Several years ago I worked with color management in application software, and was often surprised at the amount of work that went into creating a proper color lab and a color-managed workflow. Expensive monitors, viewing shrouds, flat gray painted rooms, special viewing lamps, colorimeters and spectrophotometers, robotic tablets that automated the measurement of hundreds of printed color patches. The process seemed excessive at times - but this was for delivering accurate color to the printing industry - where there are professionals who care about that sort of thing!
(Most people just don't appreciate the amount of work and skill that goes into bringing accurate color to your screen or print.)
But this was at work, not at home where I did most of my own photo post-processing. At home, I bought one of the old Spyder colorimeters and just kept my monitors calibrated, and used standard color profiles for the printer & paper I was using.
Over time, my Spyder got old and outdated, was a pain to use, and eventually was not supported by the latest OS anymore. And I found that using the OS X by-eye calibration, combined with an Ott-Lite to view prints, gave me "pretty good" results.
I invested in a Macbeth Color Checker - one of those big 24-patch color panels, and would sometimes use that when I both had the time and wanted to try and get things more accurate. But its kind of large, and you have to take care of it - its a "studio-only" device really.
I combined that with the camera calibration profile generation in LightRoom - and really noticed a difference in the raw image processing - but still it was such a pain to use - I did a few camera profiles for different lighting conditions and lived with that.
I have a two monitor setup - and I was noticing a drift in both color (one was warmer) and gamma (one was brighter) - and got to the point where I would only use one of them for adjustments - and even then I'd find results were not what I expected.
I started investigating the current crop of "prosumer" color management tools, eventually narrowing it down to either the ColorMunki Photo or the iDisplay Pro. The ColorMunki has the advantage of building print profiles, although not without a bit of hand labor, and of unknown quality. The iDisplay Pro only works on displays (and projectors) but supports 2 monitors. I decided I needed multiple monitor support more than questionable printer profiling (manufacturers distribute paper profiles anyway.) The icing on the cake was that it was bundled with the ColorChecker Passport - a miniature 24-patch color table that comes in a plastic case for travel.
Hooked it up - downloaded the latest version - calibrated both monitors quickly and easily right into D65 brightness. They now match again! Next, I tried it on my laptop, worked fine there too. The before/after results were quite obvious.
Just for fun, I tried it on a Mac Mini I have attached via HDMI to an LCD television - there was its only stumbling block - the television doesn't have automatic display controls so you have to readjust it manually to get it into the initial range for adjustment. But those adjustments may not be the best for viewing movies. Since I don't do any critical color work there I just left it alone and used a darker range.
The portable ColorChecker is nice to have too - I can take a photo of it under the current light conditions and generate a calibration profile to match. The software installs a LightRoom plug-in, and using it you can easily generate and install new profiles. (Better get your naming scheme worked out early if you start generating a lot of them though!)
You can find product info on the devices mentioned here:
iDisplay Pro
ColorMunki Photo
ColorChecker Passport
ColorChecker Classic
I don't know if the ColorMunki is any "better" than the iDisplay Pro, but the iDisplay is working well enough for me at the moment. I was a little concerned at first about using a colorimeter instead of a spectrophotometer, but for LCD displays the colorimeter works well.
Friday, January 4, 2013
Monday, May 28, 2012
restoring an osx lion system, should anyone ever ask:
My system was starting to get flakey, weird errors, lockups. Then Time Machine was failing to backup. At first I thought that the Time Machine drive was flakey, but after swapping it out, it still wouldn't work. After going through the Recovery dance (Disk First Aid, Repair Permissions, Directory rebuild with Disk Warrior) I concluded that really it was the system drive that had problems.
I bought a new drive, slapped it into an external carrier, and proceeded to restore my last good Time Machine to it. That went fine, I swapped it out, put it into the machine (laptop) but then I discovered it had no Recovery partition on the new drive.
Lion Recovery Assistant, available from Apple, probably works to install a Recovery partition to another drive, but it's boot drive has to have a Recovery partition on it.
By then, it was getting late. Did I really want to pull the drive from the laptop, hook it to another machine, add a new Recovery partition, then put it all back? No. I opted for the simpler approach that I should have used from the beginning - I could sleep while that has going on!
Really, the simplest way to setup a new disk to replace your old one seems to be:
-30
My system was starting to get flakey, weird errors, lockups. Then Time Machine was failing to backup. At first I thought that the Time Machine drive was flakey, but after swapping it out, it still wouldn't work. After going through the Recovery dance (Disk First Aid, Repair Permissions, Directory rebuild with Disk Warrior) I concluded that really it was the system drive that had problems.
I bought a new drive, slapped it into an external carrier, and proceeded to restore my last good Time Machine to it. That went fine, I swapped it out, put it into the machine (laptop) but then I discovered it had no Recovery partition on the new drive.
Lion Recovery Assistant, available from Apple, probably works to install a Recovery partition to another drive, but it's boot drive has to have a Recovery partition on it.
By then, it was getting late. Did I really want to pull the drive from the laptop, hook it to another machine, add a new Recovery partition, then put it all back? No. I opted for the simpler approach that I should have used from the beginning - I could sleep while that has going on!
Really, the simplest way to setup a new disk to replace your old one seems to be:
- get a fresh OSX Lion installer (option+Purchases on App Store is one way) and install it;
- boot from your new Recovery partition (cmd+R), and Restore from Time Machine backup;
- reboot and apply Software Update.
This was aided by my having a bootable system that could talk to App Store and reinstall it. So maybe the extra step wasn't a total waste. Felt that way though.
One of those flash keys (prebuilt or diy) might also work.
Of course, this won't clone your Bootcamp partition if you're using one. I may not reinstall mine - i hardly used it before.
-30
Monday, October 3, 2011
20111002-151800-pano-hdr-1
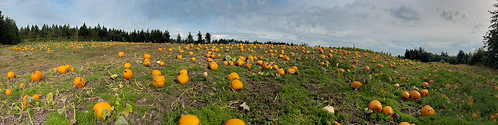
Suyematsu pumpkin patch, 180-degree view, panorama stiched from HDR images.
Thursday, September 29, 2011
2011-09 Harvest Fair Prep


2011-09 Harvest Fair Prep, a set on Flickr.
photos of behind-the-scenes activities getting ready for the annual Harvest Fair event.
2011-09 Harvest Fair


2011-09 Harvest Fair, a set on Flickr.
a few photos from the annual Harvest Fair, a fund-raising event for Friends of the Farms.
Thursday, September 8, 2011
2011-09 Duckabush Fire Sunsets


2011-09 Duckabush Fire Sunsets, a set on Flickr.
The fire in the Duckabush River basin has given us a couple of spectacular sunsets so far this week.
Wednesday, August 31, 2011
Cassandra with Ruby
Experiencing LoadError on thrift_client/connection trying to get "require 'cassandra'" to work on OSX. Fixed by noting where the thrift_client gem directory is, then use:
- chmod o+r/thrift_client/connection/*.rb
- chmod o+r/thrift_client/*.rb
make sure that the connections directory as +x permission, or you'll get a similar error on thrift_client/connection/base.
update: then again, so far the 0.12 version fails to open connections to a local Cassandra server anyway,
making todays' frustrations in dealing with Cassandra integration complete.
tomorrow, one more try, then its either switch to Python or just break down and write it in Java.
- chmod o+r
- chmod o+r
make sure that the connections directory as +x permission, or you'll get a similar error on thrift_client/connection/base.
update: then again, so far the 0.12 version fails to open connections to a local Cassandra server anyway,
making todays' frustrations in dealing with Cassandra integration complete.
tomorrow, one more try, then its either switch to Python or just break down and write it in Java.
Subscribe to:
Comments (Atom)